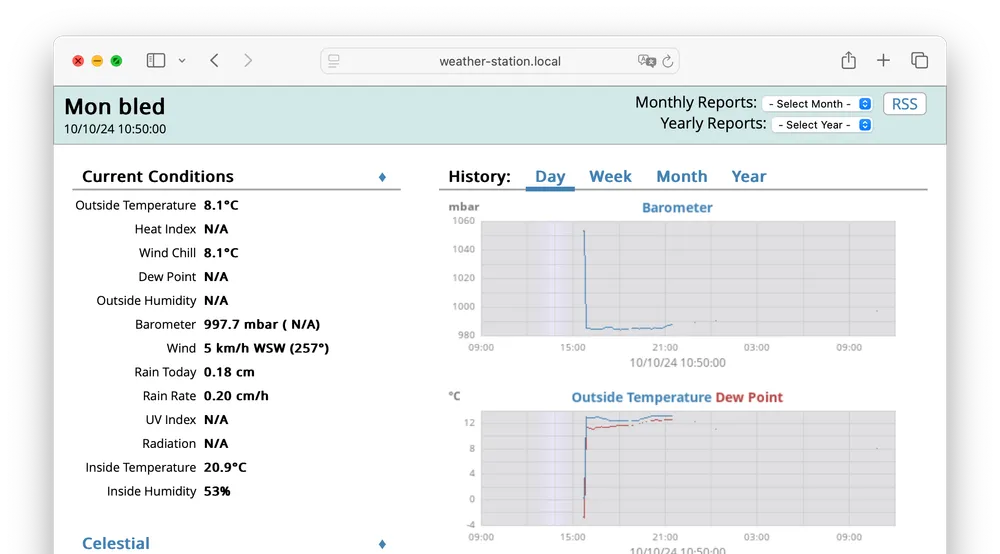
DIY Davis Vantage Vue Sensor Suite receiver
A basic receiver built with an RFM69, an ESP32 and Rust. Compatible with WeeWX and the MeteoStick driver running on a Pi Zero W
Update
I’ve finally uploaded the redesigned PCB file (EasyEDA pro) to the Git repository. The GPIO configurations have changed, so the wiring has been updated accordingly in the Git README. Everything has been running flawlessly for the past seven months.
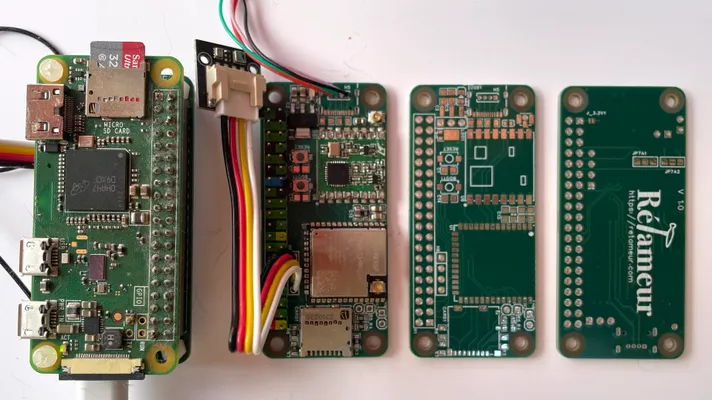
Original article
The goal of this project was to build a receiver for my Davis Vantage Vue (European version) as I didn’t like the official console. Since then, I think they released a new model, but anyway I prefer to have total control and the flexibility of a DIY solution. I did a first version in C++ more than a year ago, then decided it was a good little project to start learning Rust. Everything is working quite well, but as it’s my first Rust program, things may look odd to a seasoned rustacean. It was also a good occasion to design my first PCB. The prototype is functional but with some flaws. I’m planning to design a new version that I’ll share here when ready.
It shouldn’t be too difficult to adapt the project to work in North America (the RF Transceiver exists in 915 Mhz).
Overview
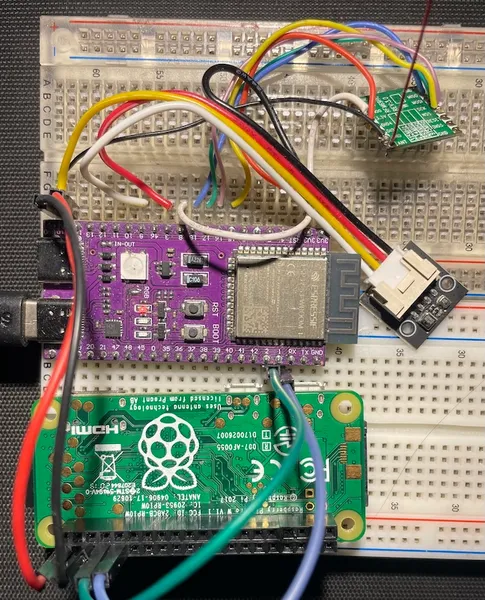
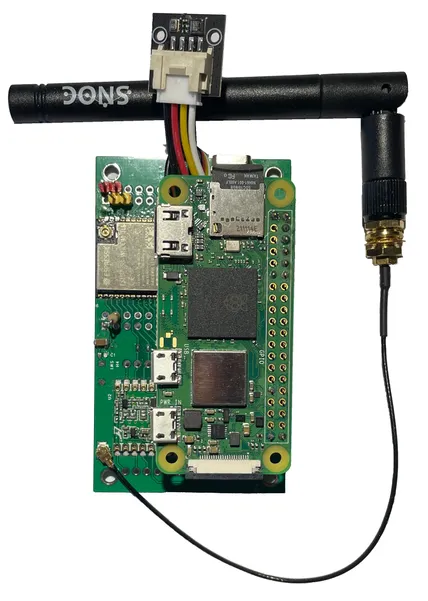
The main components are :
- RFM69HCW 868Mhz module : the RF Transceiver used to receive data from the weather station sensors.
- AHT20 + BMP280 module:
- AHT20 is a humidity and temperature sensor
- BMP280 is an absolute barometric pressure and temperature sensor
- ESP32-S3: the MCU that glues everything together
- Raspberry Pi Zero W: run WeeWX and a Web server to store and display the data
The ESP32 is the central part. It talks to the RFM69 over SPI, to the AHT20 and the BMP80 over a shared I2C bus and to the Raspberry Pi through a UART.
Total Cost
The total cost in France in 2024, is less than 30€ (thanks to AliExpress except for the Raspberry). And less than 10€ for the receiver part only. The Raspberry can be mutualised with other home automation projects. Or even removed by updating the ESP32 program to send the data directly to the cloud or an existing local server.
- ESP32-S3 Devboard : 5€
- RFM69HCW : 2.7€
- AHT20 + BMP280 : 1.5€
- Raspberry Pi Zero 2 W : 19€
Wiring
| ESP32 | RFM69 | AHT20+BMP280 | Raspberry | Comment |
|---|---|---|---|---|
| 8 | DIO0 | |||
| 15 | NSS | |||
| 16 | SCK | |||
| 17 | MOSI | |||
| 18 | MISO | |||
| ANT | Connect a wire of about 8.5 cm or a proper antenna | |||
| 3 | SDA | |||
| 9 | SCL | |||
| GND | GND | GND | 6 or 9, 14, 20, … | |
| 3V3 | 3.3V | VDD | ||
| 5Vin | 2 or 4 (5V power) | Solder the IN-OUT jumper on the dev board | ||
| 1 | 10 (GPIO 15 - RXD) | |||
| 2 | 8 (GPIO 14 - TXD) |
The ESP32 code
Nothing in the code or the hardware is specific to the ESP32 S3 variant. It just happens to be my go to ESP. It should be easy to modify the “.cargo/config.toml” and maybe some GPIO to target another variant (ESP32, C3, C6, etc.)
Setup the Environment
The ESP32-S3 has Xtensa cores which are not supported yet by the default Rust toolchain. So we need to install tools provided by Espressif to compile the project. More info
Installing the Raspberry Pi
The following steps are for a “Pi Zero W” or “Pi Zero 2 W” with a Raspberry Pi OS based on Debian Bookworm. As for the ESP variant, it shouldn’t be too difficult to use another version of the Raspberry if needed.
Step 1
: Prepare the SD-Card
Download Raspberry Pi imager on the official website
We are going for a headless and lite configuration of the Raspberry Pi (no screen, no keyboard, no desktop environment). Choose the lite version of the OS “Raspberry Pi OS Lite” 32-bit for the Zero and 64-bit for the Zero 2.
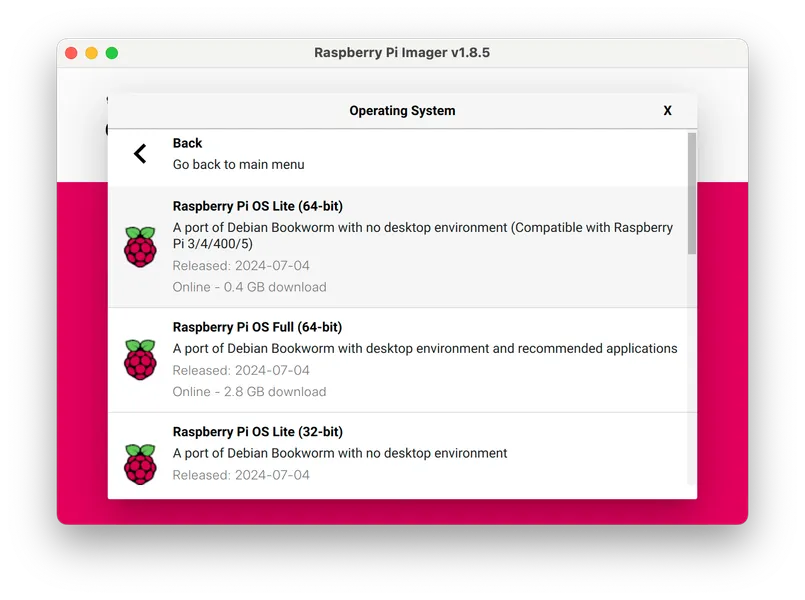
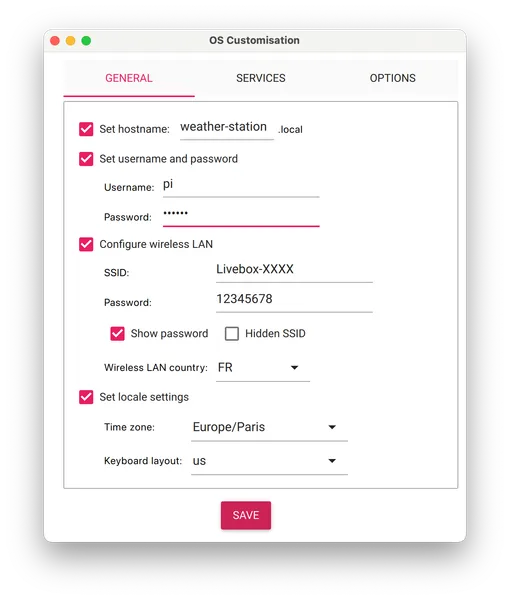
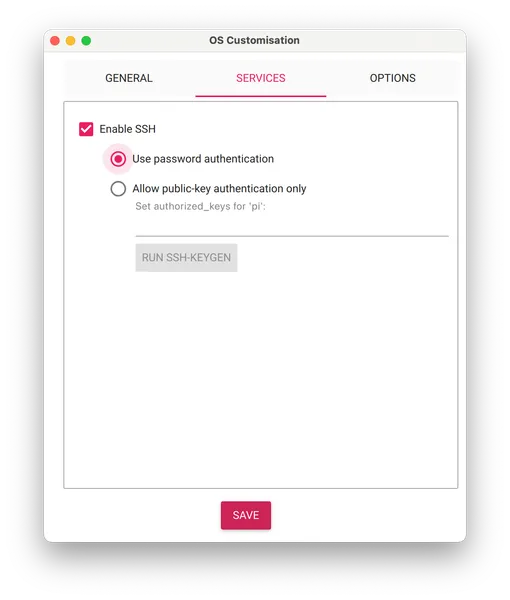
Then properly customise the settings in Pi Imager. Otherwise the Raspberry won’t connect to the WiFi and SSH will be disabled.
Step 2
: Connect to the Raspberry Pi
Be patient, the first boot is very, very slow (between 5 and 10 minutes on the Zero). Once the Pi is connected to the WiFi, we need to find its IP address. We can use the following command or go to the admin interface of the router.
ifconfig | grep broadcast | arp -a

...
weather-station.home (192.168.1.19) at b8:27:eb:9a:b5:ea on en1 ifscope [ethernet]
...

ssh [email protected]
We are now logged in the Pi.
Step 3
: Disable the Bluetooth
The Pi Zero W and Zero 2 have 2 UART. A shitty one and a good one. By default the good one is used for the Bluetooth but we need it. So we must change the configuration.
sudo nano /boot/firmware/config.txtAdd dtoverlay=disable-bt at the end of the file and save.
Step 4
: Disable the login console on the UART
sudo nano /boot/firmware/cmdline.txtDelete console=serial0,115200 and save.
sudo systemctl disable hciuart
sudo reboot
Step 5
: Check if we receive data from the ESP [Optional]
Once the Pi has rebooted and everything is wired together, we can check if we receive data from the ESP on the serial port.
sudo apt update
sudo apt install tio
tio /dev/ttyAMA0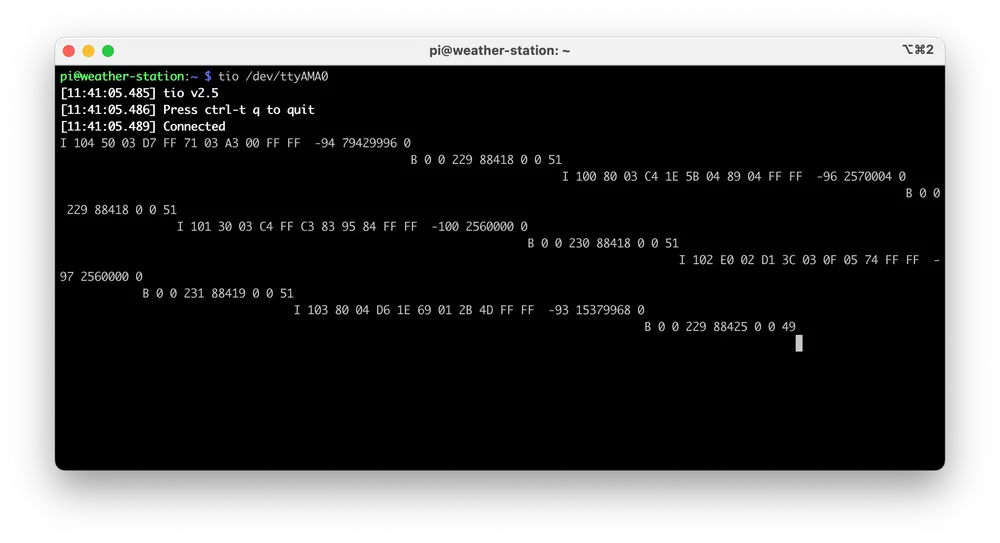
Step 6
: Install WeeWX
Things may change and brake in the future. In case of problem refer to the official documentation
wget -qO - https://weewx.com/keys.html | \
    sudo gpg --dearmor --output /etc/apt/trusted.gpg.d/weewx.gpg
echo "deb [arch=all] https://weewx.com/apt/python3 buster main" | \
    sudo tee /etc/apt/sources.list.d/weewx.list
sudo apt update
sudo apt install weewx
For now, when asked for the weather station type, choose Simulator not Vantage.
Allow the weewx user to access the serial port by adding it to the dialout group.
sudo usermod -aG dialout weewxStep 7
: Install the MeteoStick driver
The ESP emulates a MeteoStick device so we need to install an extension to WeeWX.
wget -O weewx-meteostick.zip https://github.com/matthewwall/weewx-meteostick/archive/master.zip
sudo weectl extension install weewx-meteostick.zip
sudo weectl station reconfigure
When asked to:
- Choose a driver => select Meteostick
- Specify the port => type
/dev/ttyAMA0 - Specify the type of the rain bucket => probably 0.2 mm per tip for a European station
To help in case of problem, we can enable debugging info. And once we checked everything is fine, we can disable the debug logs to prevent wearing out the SD-Card too quickly.
sudo nano /etc/weewx/weewx.confSet debug = 1 at he top.
And in the [Meteostick] section :
debug_parse = 3
debug_serial = 3
debug_rain = 3
We must restart WeeWX to enable our modifications.
sudo systemctl restart weewxWait a bit, and check for errors with one of the following command :
sudo systemctl status weewx
tail -f /var/log/syslog
Step 8
: Install a Web Server
To access the WeeWX reports WeeWX we need to install a Web Server.
sudo apt install nginxThe reports are generated every 5 minutes, so we should wait a bit before seeing any data.
In the Web browser go to http://weather-station.local/weewx/ or http://[YOUR IP]/weewx
